Developing our Bio-resin & waste sawdust surface

Sawdust - the never-ending waste challenge found in every woodworking workshop and studio around the world. In our Work/Shop, we are continuously brainstorming ways of re-using or recycling our waste sawdust so it doesn’t end up in landfill.
Developing this new material is our way of exploring new and interesting ways of approaching waste. Here we share our detailed process in the hope that it encourages other makers to try it themselves and build upon what we have already discovered - an open source sustainable sawdust solution if you like…
Our Work/Shop produces two main types of wood waste - small plywood offcuts and sawdust. In 2017 we launched the £9.99 collection entirely made from our wasted offcuts, each piece designed to re-use some of our most common waste. The £9.99 collection was even long-listed for the Dezeen Award for Sustainable Design in 2019, recognising the innovation and forward-thinking involved in developing this collection.Following the success of the £9.99 collection, Lozi’s founder Soroush turned his hand to our sawdust waste. Inspired by the recycled plastic pioneers Smile Plastics and their work creating surface sheeting from household plastic waste, he decided to create a sheeting material from our waste sawdust.

Development started in early 2018, with small experimentations to test how the sawdust would react with a variety of other materials. This allowed us to develop a formula: Sawdust + Bio-Resin + Pigment. A seemingly simple three material process that took a lot of experimenting to finalise as these materials reacted with each other in unexpected ways.
After experimenting for almost a year, our sawdust surface was first presented during Lozi’s “Manufacturing from Waste Materials” talk during London Design Week in 2018. We showcased our early trials, playing with the types of sawdust, bio-resin and pigment used as well as the different ways of setting it and testing the structural stability of the final piece.


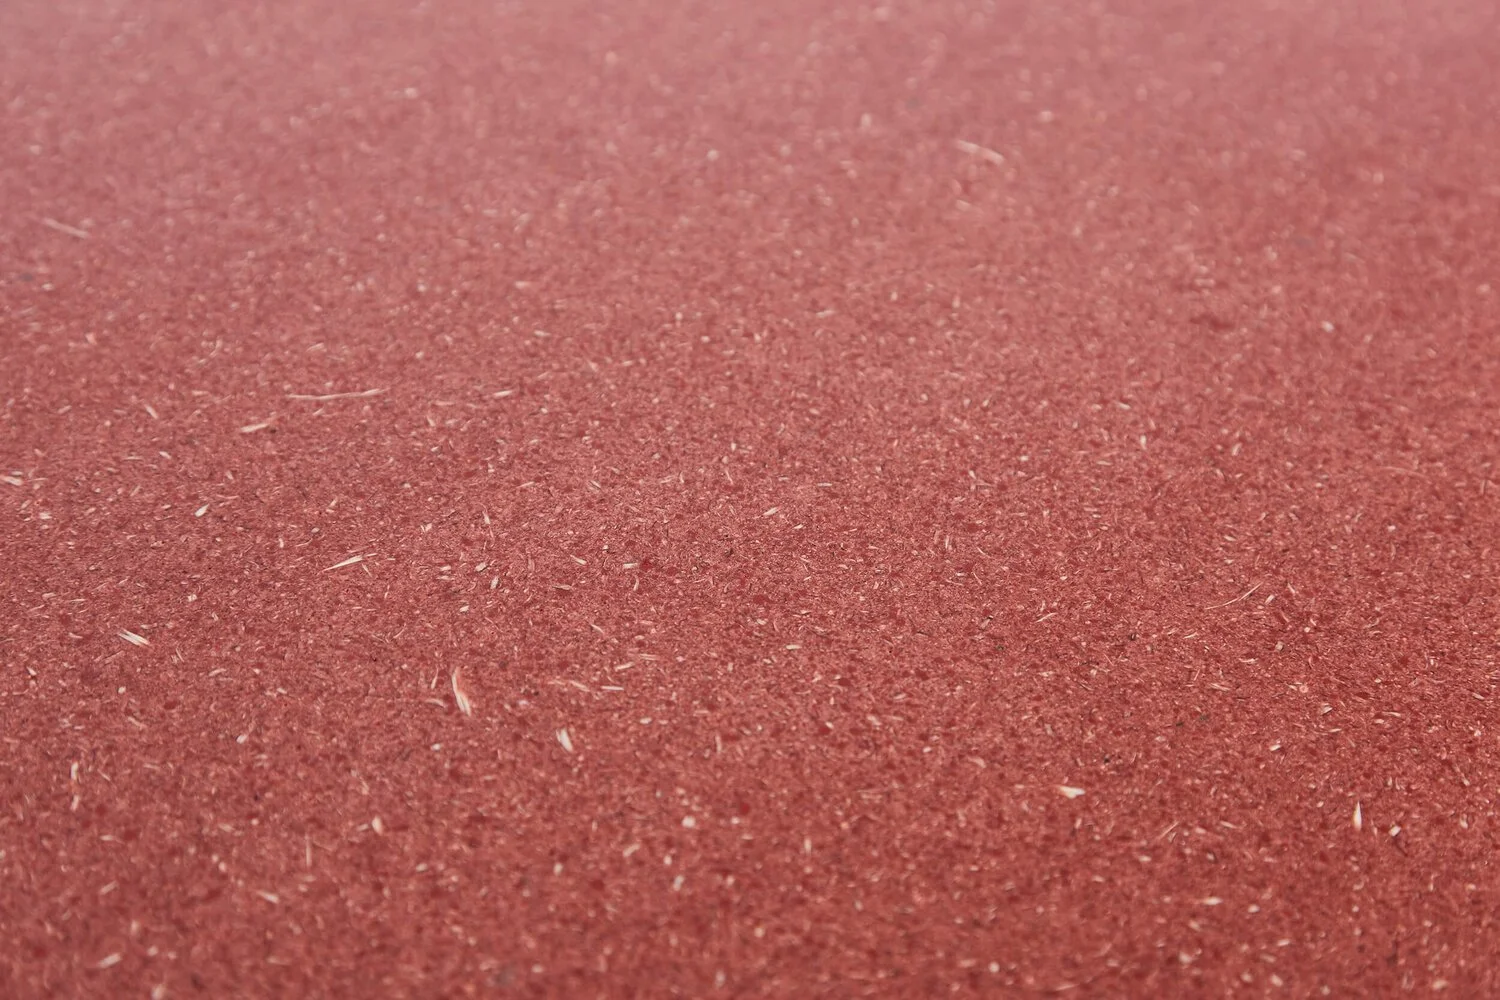
For the sawdust, we chose a combination of fine and coarse sawdust. Through experimentations, we discovered that using only fine dust dried up the bio-resin and didn’t set, whilst only coarse dust made the final surface look like chipboard and very brittle. An equal ratio of the two allowed the finer grains to fill the space between the coarser pieces, giving an intriguing texture as well as keeping the surface stable. We also lightly sprayed the sawdust with water to rehydrate it, helping reduce the amount of bio-resin needed.
Then we added the pigment to create a dry colourful powdery mix, using environmentally friendly edible paint powders (that are even child safe!). Having experimented with a variety of colour tones, we discovered that warm pigments worked best with the sawdust’s natural pale yellow colour. Colder tones like blues and greens clashed with the sawdust, creating murky concrete and khaki like colours that didn’t pop and were difficult to control. We finally settled on a deep red pigment, creating a bold and bright colour that added an element of intrigue to the surface by contrasting with the natural tones of the chunkier sawdust elements.

The powdery sawdust and pigment mix waiting for the bio-resin.

Carefully measuring out the bio-resins.
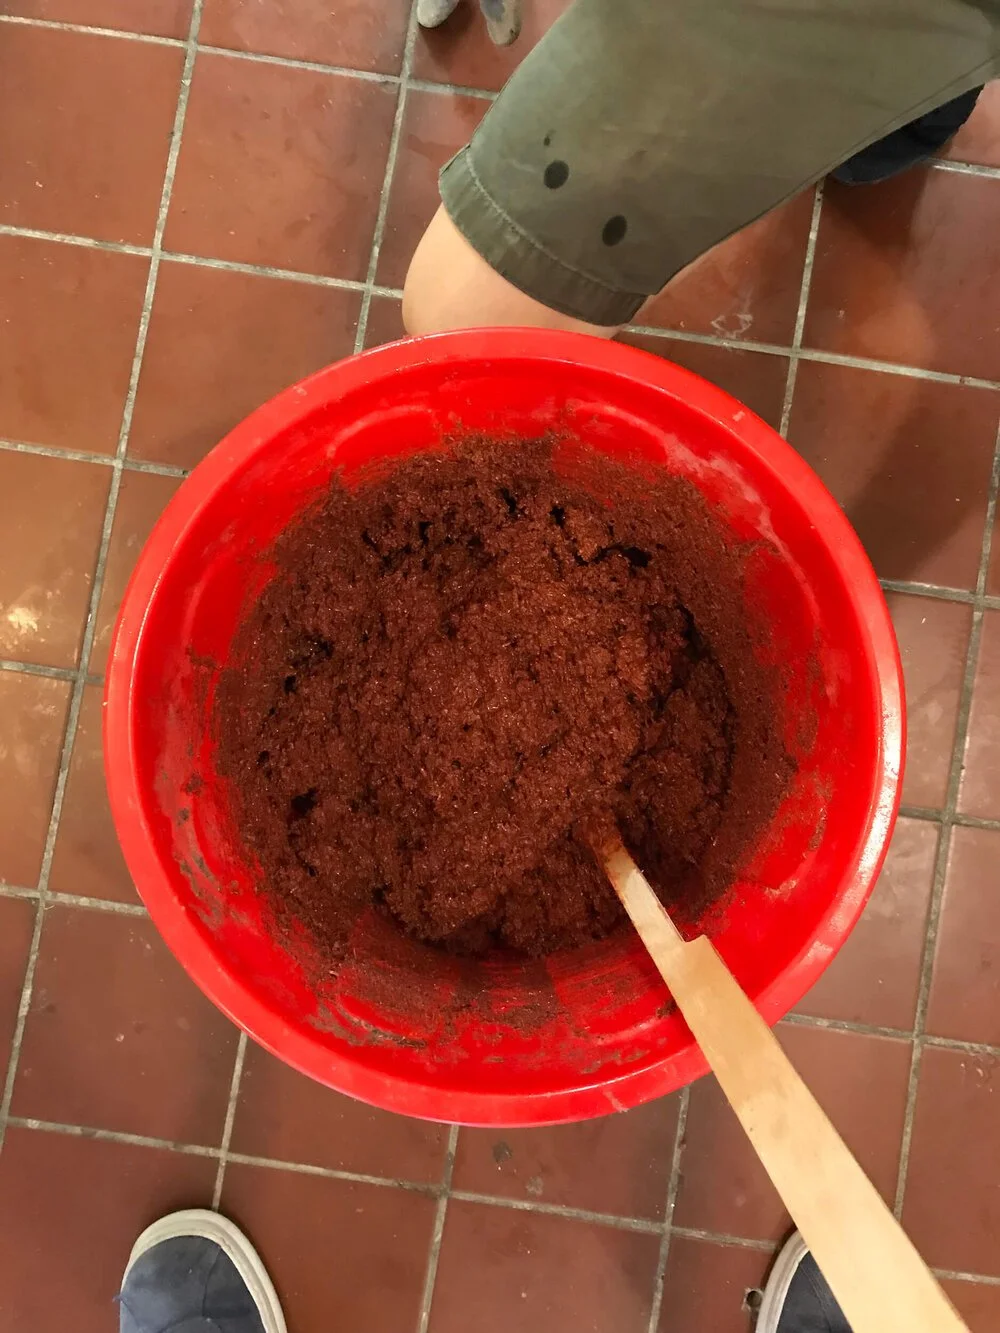
The final paste is ready to be moulded.
Finally, we added the bio-resin. We used bio-resins from Entropy resins, one of the most environmentally friendly resin companies on the market. Their bio-resin has a 27% content made from bio-sources and they are continually developing new ways to lower their product’s impact on the environment. Though this material is much more expensive than traditional petroleum based resins, by encouraging people to use it we hope to play a small part in helping manufacturers develop these products even further. It also has the added benefit of being odourless!
Slowly pouring the resin into the sawdust and pigment mixture takes patience and strong arms. Concrete mixers might be able to be used in a more industrial setting, but at Lozi good old fashioned elbow grease and a solid bucket were more than adequate. Soroush mixed as he went along until he got the right consistency - too much resin and the surface would look glossy and cheap, not enough and it wouldn’t be stable - and made sure the mix was perfectly consistent throughout to avoid any serious defects.

The inbuilt cast, protecting the plywood from leaks and damage.

Mixing the Bio-resin ready

Spreading out the mix directly into the cast.
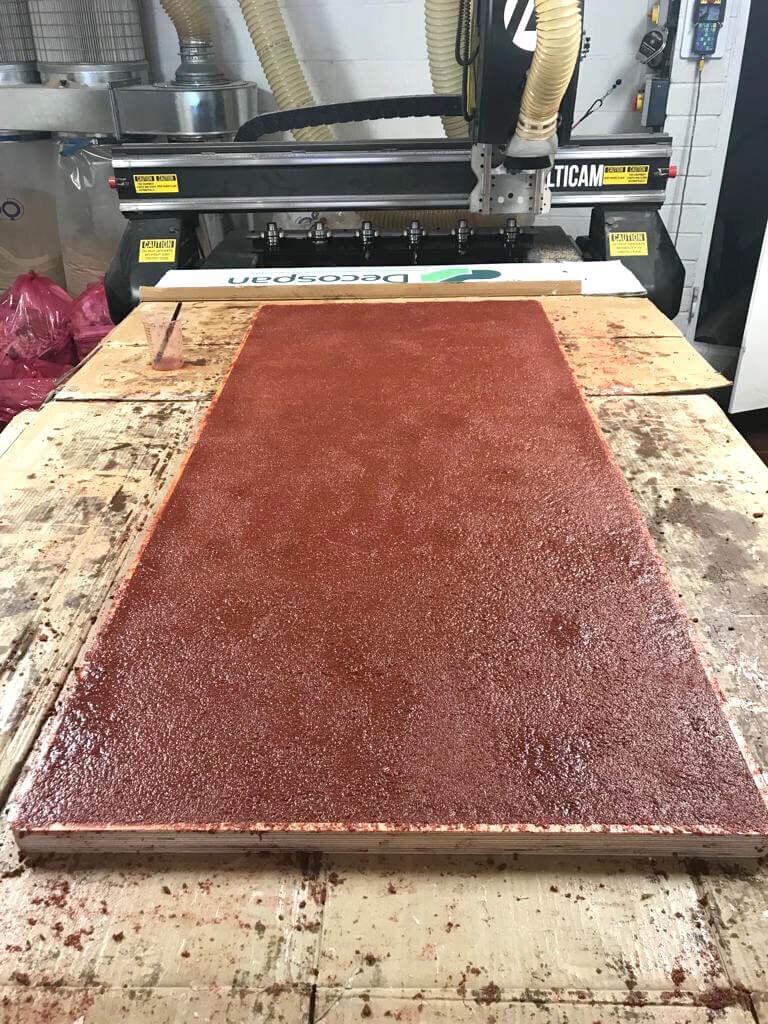
Once this paste was mixed, we created a mould built directly into the table top by cutting out the top 8mm of a sheet of plywood. This stabilised the mould and avoided leaks that could damage and stain the body of the plywood.
The mix was then poured into the mould, and spread out evenly (to any depth between 4 and 10mm). The mould was tapped and shaken to remove any air bubbles (a very similar process to setting concrete foundations) to ensure a flawless luxury finish that would stand out against other materials available on the market.
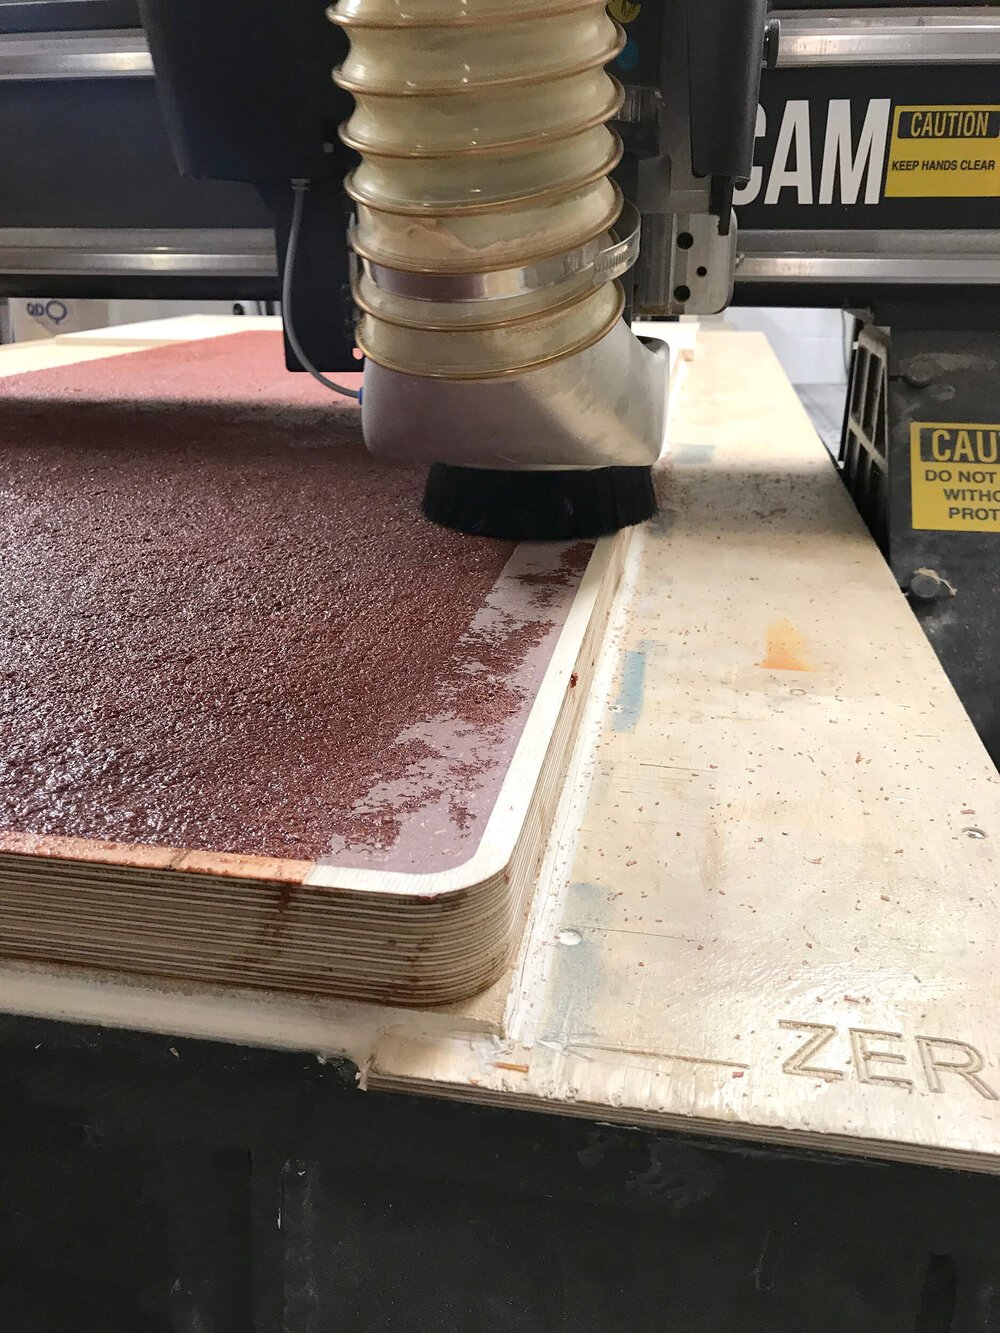
Once the bio-resin has been left to set for at least 72 hours, it can be shaved down using the CNC’s 1-3mm tool, giving a beautiful consistent flat surface. Touch up any air bubble holes that might appear with bio-resin and pigment mix, leave to set and shave down again.
The surface is then finally finished by hand, first sanding it down then oiling it and repeating this process two or three times to achieve the desired look

This unique material was developed after a long two-year process of experimentation. An intriguing luxury surface, it was a resounding success when launched last September at London Design Fair. However, this show-stopping centrepiece of furniture comes with a few downsides; it’s a time-consuming process that limits what else can be done in the work/shop at the same time. Unfortunately, with our current set-up, it is hard to produce at scale, resulting in only re-using a fraction of our total waste. We will continue to research into ways of re-using our waste sawdust.
